Under cabinet lighting is one of those kitchen upgrades that feels small but makes a noticeable difference every single day. You may not think much about the dark shadows on your countertop until they’re gone, but proper task lighting in your kitchen affects how you cook, how safe your workspace is, and how your home holds up during an inspection. When installed correctly, it also keeps your electrical system fully aligned with code requirements.
In this guide, we’ll break everything down in plain English. You’ll learn what this type of kitchen lighting involves, why the wiring matters more than most homeowners expect, and how to approach it safely and correctly.
What Is Under Cabinet Lighting and Why Does It Matter?
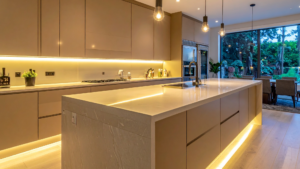
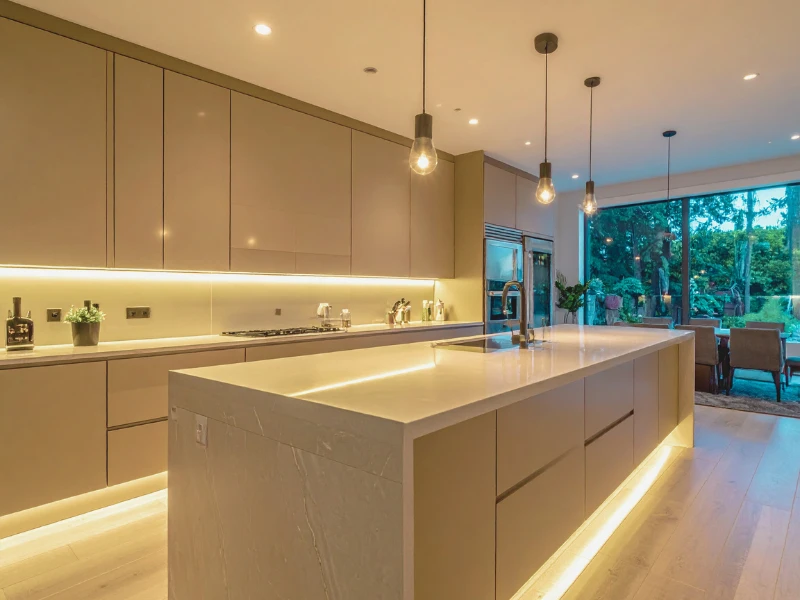
This type of kitchen task lighting consists of fixtures mounted to the underside of upper cabinets to illuminate the countertop surface below. It eliminates shadows created by overhead lighting and provides focused light exactly where you need it most at the prep area.
This matters beyond aesthetics. Poorly lit countertops are a safety hazard, especially when using knives, mandolins, or hot cookware. Beyond daily safety, improperly wired fixtures can create fire risks, fail inspections, and cause real problems when you go to sell your home. Getting the installation right from the start protects your family and your property.
Wiring Requirements You Should Know
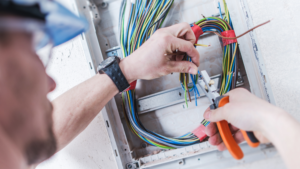
Before any fixture is mounted, the wiring behind it must meet specific standards. Kitchen lighting circuits must be on a dedicated 15-amp, 120-volt circuit separate from your small appliance branch circuits, per NEC requirements. Low-voltage systems operating at 30 volts or less must use a listed Class 2 power supply per NEC Article 411. All wiring must be protected from physical damage. Exposed NMB cable is generally not permitted under cabinets and must be run through flexible conduit or armored cable (MC/AC) to meet NEC 334.15 requirements. All fixtures must be UL-listed and appropriate for their installed location.
Understanding Your Lighting Options
Hardwired vs. Plug-In Systems
Hardwired systems connect directly to your home’s electrical wiring and are permanently installed. They offer a clean, professional appearance with no visible cords. Plug-in systems use a standard outlet and are easier to install yourself, but they leave cords visible and can clutter your backsplash.
For long-term functionality and code compliance, hardwired systems are generally the preferred approach, especially during kitchen remodels or new construction.
LED Strip Lights vs. Puck Lights vs. Linear Fixtures
LED strip lights are flexible and attach along the full length of the cabinet. They provide even, continuous illumination. Puck lights are small, round fixtures spaced at intervals easier to install,l but can create hot spots and shadow gaps if not spaced correctly. Linear bar fixtures offer a sleek single unit that runs the full cabinet width and delivers even light distribution with a clean appearance.
Low Voltage vs. Line Voltage Systems
Low-voltage systems run on 12V or 24V DC and require a transformer to step down from standard household current. They are energy efficient and generate less heat. Line-voltage systems run on standard 120V AC simpler to wire, but produce more heat and carry a greater risk if wiring errors are made.
NEC Code Requirements for Cabinet Lighting
The National Electrical Code (NEC) sets the rules that govern how kitchen task lighting must be wired and installed.
NEC Article 411 Low Voltage Lighting Systems
NEC Article 411 covers lighting systems operating at 30 volts or less. It requires that both the Class 2 power supply and the connected lighting equipment be listed by a nationally recognized testing laboratory. A common inspection failure occurs when an unlisted power supply is used even if the fixtures themselves are listed. Both components must meet the standard.
Dedicated Lighting Circuit Requirement
Kitchen lighting must be supplied by a dedicated lighting circuit, not the small appliance branch circuits that power your countertop outlets. These circuits are typically 15-amp, 120-volt circuits protected by an AFCI breaker as required by NEC 210.12.
Wiring Protection Under Cabinets
NEC 334.15 requires that all wiring be protected from physical damage. Under kitchen cabinets, NMB cable must be enclosed in flexible metal conduit (FMC) or armored cable (MC/AC). Exposed Romex stapled to the underside of cabinets is not acceptable in most jurisdictions and will fail inspection. All wiring terminations must be made inside approved electrical boxes — no open splices are permitted under any circumstance. You can view full NEC kitchen wiring guidelines at NFPA.org.
The Installation Process: What to Expect
Step 1 — Planning and Layout The electrician determines fixture placement, typically positioning lights two-thirds of the way back from the cabinet’s front edge to reduce countertop shadows. Circuit routing is mapped before any work begins.
Step 2 — Rough-In Wiring During a remodel, wiring is run before cabinets and backsplash tile are installed. In retrofit projects, wiring is fished through walls or routed through the cabinet interior using flexible conduit to keep runs concealed.
Step 3 — Fixture Mounting Fixtures are mounted to the underside of upper cabinets and connected to the low-voltage driver or directly to the circuit wiring, depending on the system type.
Step 4 — Switch or Dimmer Installation:n A dedicated wall switch or dimmer is installed to control the lighting independently. Dimmer switches must be rated for LED loads to avoid flickering or overheating.
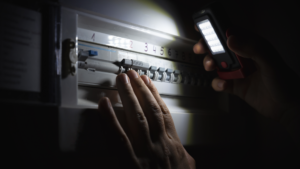
Step 5 — Inspection and Testing. ing In many jurisdictions, new kitchen lighting circuits require a permit and inspection. The electrician tests the full circuit, verifies AFCI protection, and confirms the installation is ready for sign-off.
Common Installation Mistakes to Avoid
Tapping Into the Wrong Circuit
One of the most frequent code violations is wiring cabinet fixtures into the small appliance branch circuits that serve countertop outlets. NEC requires kitchen lighting to be on its own circuit. Mixing them creates overloads and fails inspection.
Using Unlisted Components
Installing a low-voltage system with an unlisted Class 2 driver is a code violation under NEC Article 411, even if the rest of the installation is perfect. Always verify that both the power supply and fixtures carry proper UL or ETL listings.
Leaving Wiring Exposed
Stapling NMB cable to the underside of cabinets is one of the most common DIY mistakes in these projects. This violates NEC 334.15, which requires wiring to be protected from physical damage. Flexible conduit or armored cable must always be used in exposed under-cabinet runs.
Skipping the Dimmer Compatibility Check
Not all dimmer switches work with LED fixtures. Using an incompatible dimmer causes flickering, buzzing, and premature failure. Always confirm the dimmer is rated for LED loads and compatible with your specific fixtures before installation.
When to Call a Licensed Electrician
Wiring for under cabinet lighting involves live kitchen circuits, conduit work, and code-specific requirements that go well beyond changing a light bulb. If your kitchen does not already have a dedicated lighting circuit, adding one means work at the electrical panel — something that always requires a licensed electrician.
Retrofit installations in finished kitchens also require fishing wire through walls and ceilings without damaging tile, drywall, or cabinetry. This is a skill that takes real experience to do cleanly and correctly. Licensed electricians also understand local permit requirements and can ensure your installation is inspection-ready from day one.
Final Thought
Proper kitchen task lighting is more than a decorating choice. It is a functional safety upgrade that belongs on a properly wired, code-compliant dedicated circuit. From choosing the right fixture type to protecting wiring with the correct conduit, every detail of the installation affects both performance and safety.
If you are planning a kitchen remodel or simply want to add under cabinet lighting to an existing space, it’s best to work with a licensed electrician from the start. A professional can plan the circuit, run the wiring correctly, and make sure everything passes inspection the first time. Contact us today to schedule an evaluation or discuss your kitchen lighting needs. The right installation today means bright, safe countertops for years to come.
FAQs
1. Can under cabinet lighting be plugged into a regular kitchen outlet?
Plug-in systems can use a standard outlet, but hardwired systems must be on a dedicated lighting circuit. NEC rules prohibit hardwiring them into the small appliance branch circuits that serve countertop receptacles.
2. Do I need a permit for this type of lighting installation?
In most jurisdictions, adding a new dedicated lighting circuit requires a permit and inspection. Check with your local authority having jurisdiction (AHJ) or consult a licensed electrician before starting work.
3. What is the best fixture type for a kitchen?
Hardwired LED linear bar fixtures or LED strip lights offer the best combination of even illumination, energy efficiency, and clean appearance. The right choice depends on your cabinet size, desired brightness, and whether you want dimming capability.
4. Can I install cabinet lighting myself?
Plug-in systems with no wiring changes can be a DIY project. However, any hardwired installation involving new circuits, panel work, or conduit runs should be handled by a licensed electrician to ensure safety and code compliance.
5. Why is my kitchen lighting flickering after installation?
Flickering is most often caused by an incompatible dimmer switch. Make sure your dimmer is rated specifically for LED loads and listed as compatible with your fixture brand. A loose connection in the circuit can also cause flickering.