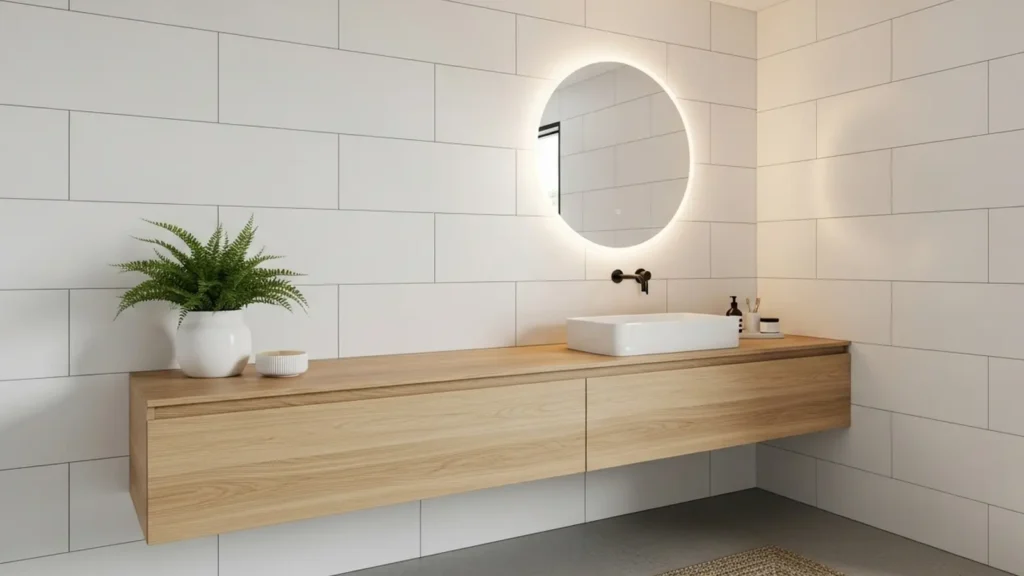
Bathroom vanity lighting installation is one of the most impactful upgrades a homeowner can make to improve both the function and appearance of a bathroom. Most people live with poor vanity lighting for years, dealing with harsh shadows, dim task lighting, or outdated fixtures that make the space feel dated, without realizing how straightforward and affordable a proper installation can be. By understanding fixture types, placement rules, wiring requirements, and common mistakes, you can plan a vanity lighting upgrade with confidence and get results that look professionally done. This guide covers everything you need to know.
What is Bathroom Vanity Lighting Installation? (The Simple Definition)
Bathroom vanity lighting installation is the process of mounting and wiring a light fixture directly above or on the sides of a bathroom mirror to provide balanced, shadow-free illumination for grooming tasks. Unlike general ceiling lighting, vanity fixtures are positioned at or near face level to eliminate the unflattering shadows that overhead-only lighting casts across the face.
A proper vanity lighting installation involves selecting the right fixture type, sizing it correctly to the mirror and vanity, connecting it safely to an existing wall or ceiling electrical box, and positioning it at the height and angle that delivers the most even light distribution.
Vanity Lighting Placement: Quick Comparison
| Fixture Position | Shadow Quality | Best For | Common Fixture Type |
|---|---|---|---|
| Above mirror (centered) | Moderate shadows | Small bathrooms, single vanities | Bar light, single sconce |
| Above mirror (full width) | Low shadows | Double vanities, wider mirrors | Multi-bulb bar light |
| Side-mounted (both sides) | Almost no shadows | Vanity mirrors, makeup areas | Vertical sconce pair |
| Above and side combined | No shadows | Master baths, Hollywood style | Hollywood strip lights |
| Recessed only (no vanity light) | Heavy shadows | General lighting only | Not recommended for grooming |
Side-mounted fixtures at eye level deliver the most flattering and shadow-free light, while above-mirror fixtures are the most common and easiest to install.
Why Bathroom Vanity Lighting Installation Matters (The Real Cost Breakdown)
The Price of Getting It Wrong
| Vanity Lighting Problem | Correction Cost | Root Cause |
|---|---|---|
| Rewiring the incorrect box location | $200 to $600 | Fixture placed without measuring first |
| Replacing a wrong-size fixture | $100 to $400 | Fixture too small or too large for the mirror |
| Repairing drywall after relocation | $150 to $500 | Electrical box moved after tiling or painting |
| Upgrading undersized wiring | $300 to $800 | High-wattage fixture on an inadequate circuit |
| Fixing improper water zone violation | $250 to $700 | Fixture installed too close to the shower or tub |
A well-planned bathroom vanity lighting installation done right the first time costs $150 to $600 for materials and professional labor. Correcting a poorly planned one often costs more than starting over.
The Value Impact on Your Home
Updated vanity lighting is consistently ranked among the highest-return bathroom upgrades by real estate professionals. A dated or dim vanity fixture is one of the first things buyers notice during a showing, while a well-lit, modern vanity immediately signals a well-maintained bathroom. Homes with updated lighting in bathrooms sell faster and command higher offers relative to the cost of the upgrade.
Types of Vanity Light Fixtures: Know Your Options First
Different bathroom sizes, mirror dimensions, and personal styles call for different vanity fixture types, and choosing the right one before buying is the most important decision in the entire project. Single sconces are compact wall-mounted fixtures designed for small powder rooms or narrow vanity spaces. They work well above a small mirror or sink but provide limited spread on wider vanities.
Multi-bulb bar lights are horizontal fixtures that hold between two and ten bulbs along a single bar. They are the most versatile and widely installed vanity fixture type, available in lengths from 18 to 60 inches to match virtually any mirror width. They mount to a standard single electrical box above the mirror and are the easiest fixture for DIY installation. Vertical sconce pairs are mounted on the wall to the left and right of the mirror at approximately eye level, delivering the most even and shadow-free illumination available.
They require two separate electrical boxes at matching heights on either side of the mirror, which adds complexity to the installation.
Hollywood or theater strip lights feature multiple bare bulbs in a row and are mounted across the top of a large mirror or around its perimeter. They provide high-output, diffused lighting suited to master bathrooms, makeup stations, and larger vanity areas. Integrated LED vanity mirrors combine the mirror and lighting into a single unit. Installation is straightforward for replacing an existing mirror, but running a dedicated circuit to a hardwired model requires electrical rough-in work. Flush-mount vanity fixtures sit flat against the ceiling or wall and work in low-ceiling bathrooms where a projecting bar light would feel cramped or visually heavy.
Sizing Your Vanity Light Fixture Correctly
Getting the sizing right before purchasing a fixture saves the time and cost of a return trip to the hardware store or a second installation attempt.
Rule 1: Width relative to the mirror. For an above-mirror fixture, the light bar should be 75 to 80 percent of the mirror’s width. A 48-inch mirror pairs best with a 36 to 40-inch light bar. Going wider than the mirror pushes light outward past the face and reduces effectiveness at the task area.
Rule 2: Height above the mirror. The bottom of the fixture should sit approximately 3 inches above the top of the mirror. If the mirror top sits at 74 inches, the fixture bottom should be at approximately 77 inches from the floor, putting the light center at roughly 78 to 80 inches.
Rule 3: Side sconce height. When mounting sconces on either side of a mirror, center them at approximately 60 to 65 inches from the floor, which aligns with average eye level and reduces facial shadowing.
Vanity Fixture Sizing Reference Chart
| Mirror Width | Recommended Bar Light Width | Sconce Center Height |
|---|---|---|
| 24 inches | 18 to 20 inches | 60 to 65 inches from the floor |
| 36 inches | 26 to 30 inches | 60 to 65 inches from the floor |
| 48 inches | 36 to 40 inches | 60 to 65 inches from the floor |
| 60 inches | 44 to 50 inches | 60 to 65 inches from the floor |
| 72 inches | 54 to 60 inches | 60 to 65 inches from the floor |
Step-by-Step Overview of Vanity Lighting Installation
Understanding the installation process helps you plan the project accurately and supervise any professional work.
Step 1: Turn off the circuit breaker. Locate the bathroom lighting circuit in your panel and switch it off. Confirm the power is off using a non-contact voltage tester at the existing electrical box before touching any wires.
Step 2: Remove the existing fixture. Unscrew the mounting hardware, pull the fixture away from the wall, and disconnect the wire connections. Note how the existing wires are connected: black to black, white to white, and ground to ground or green.
Step 3: Check the electrical box. Confirm the existing box is rated for the weight of the new fixture. Most standard boxes support up to 35 pounds. Heavier fixtures require a fan-rated box or a brace kit installed between studs.
Step 4: Attach the mounting bracket. The new fixture will include a mounting bracket that attaches to the electrical box. Align it correctly before making wire connections.
Step 5: Make wire connections. Connect black to black, white to white, and ground wire to the green screw or bare copper ground. Secure each connection with a wire nut and fold wires neatly into the box.
Step 6: Mount and secure the fixture. Attach the fixture body to the mounting bracket, install bulbs if not already integrated, and restore power at the breaker to test.
Installation Time Reference
| Scenario | Estimated Time | Notes |
|---|---|---|
| Direct fixture swap (same box) | 30 to 60 minutes | Simplest replacement scenario |
| New fixture with a different mounting | 1 to 2 hours | Bracket adjustment or box upgrade needed |
| Adding side sconces (new boxes) | 3 to 5 hours | Drywall work and new wiring runs required |
| Full vanity lighting redesign | 4 to 8 hours | Multiple fixtures, new circuits, or relocation |
Common Bathroom Vanity Lighting Installation Mistakes to Avoid
Installing a fixture without checking the electrical box weight rating is one of the most common and dangerous mistakes in vanity lighting installation. A heavy multi-bulb bar light mounted to an undersized box can pull away from the wall over time or fall without warning. Choosing a fixture that is too wide for the mirror pushes light past the face and creates flat, unflattering illumination that defeats the purpose of dedicated vanity lighting.
Ignoring bathroom electrical zone requirements is a serious code violation. Most local codes prohibit the installation of certain fixture types within specific distances of a bathtub or shower. Fixtures above a tub or shower enclosure must be rated for wet locations. A standard indoor fixture installed in a wet zone is both a safety hazard and a code failure that will be flagged in any future inspection.
Using mismatched bulb color temperatures across multiple fixtures creates uneven light that appears unprofessional. All bulbs in a vanity installation should share the same color temperature, with 2700K to 3000K being the standard recommendation for warm, flattering bathroom light.
Skipping the voltage test before disconnecting wires is a dangerous shortcut that has caused serious injuries. Always confirm the circuit is dead with a non-contact voltage tester, even if you have switched off what you believe is the correct breaker.
Vanity Lighting Performance Over Time: What to Expect
Vanity lighting performance and maintenance needs shift over the years. Fixtures in their first 0 to 3 years are most prone to issues caused by improper installation: loose wire connections that cause flickering, mounting hardware that was not tightened fully, or bulbs that vibrate loose in bar fixtures without individual bulb locking mechanisms. Between 3 and 7 years, the finish degradation begins in high-humidity bathrooms. Chrome and brushed nickel can develop spotting or tarnish, and low-quality fixtures may show rust around mounting hardware.
At 7 to 12 years, integrated LED fixtures may experience driver failure, causing dimming, flickering, or complete failure without the option of a simple bulb replacement. Non-integrated fixtures can simply receive new bulbs and continue functioning well beyond this range. Between 12 and 20 years, wiring connections inside the electrical box can loosen from thermal cycling, and fixture bodies may crack or corrode enough to warrant replacement. Over the past 20 years, most vanity fixtures have been functionally outdated in terms of energy efficiency, light quality, and aesthetic style, and full replacement is the most cost-effective path forward.
Technology Tools Homeowners Can Use
Modern tools make bathroom vanity lighting planning and installation more accurate and less stressful. Non-contact voltage testers are inexpensive, handheld devices that confirm a circuit is de-energized before you touch any wires, and they should be used on every electrical project without exception. Smart dimmer switches compatible with LED vanity fixtures allow adjustable brightness levels from a wall switch or smartphone app, adding both convenience and ambiance control that a standard switch cannot provide.
Color temperature comparison cards, available at lighting showrooms and hardware stores, let you preview how different bulb temperatures will appear against your tile, paint, and cabinet finishes before purchasing. Virtual room visualizer tools offered by major lighting brands allow you to upload a photo of your bathroom and overlay different fixture styles and finishes digitally before committing to a purchase. Laser levels make it fast and accurate to confirm that side-mounted sconces are at identical heights on both sides of the mirror, which is critical for a finished, professional appearance.
DIY Installation vs. Professional Installation: Know the Difference
Homeowners with basic electrical experience can safely handle a straight fixture-for-fixture swap where the new light mounts to the same electrical box as the old one, uses the same wiring connections, and does not require any new circuit work. This is the most common vanity lighting upgrade scenario and is well within reach for a careful DIYer who confirms the power is off before beginning.
However, adding new electrical boxes for side sconces, running new wiring through walls, upgrading an undersized box, installing a dedicated dimmer circuit, or working within the wet zones near a tub or shower should be handled by a licensed electrician. These tasks involve structural penetration, code compliance, and safety considerations that go beyond basic fixture swapping.
Vanity lighting should be inspected as part of any bathroom renovation and whenever flickering, buzzing, or discoloration of the fixture body is noticed. Immediate professional attention is warranted if the fixture feels warm to the touch outside of the bulb area, if a breaker trips when the vanity light is switched on, or if any visible scorching or burn marks appear around the electrical box or mounting hardware.
Final Thoughts
Bathroom vanity lighting installation is one of the few home upgrades that improves daily life immediately, adds measurable resale value, and can be completed in an afternoon when properly planned. Taking the time to size the fixture correctly, confirm box ratings, choose the right color temperature, and respect electrical safety protocols makes the difference between a result that looks professionally done and one that needs to be redone. Plan it right once, and your bathroom will look and function better every single day.
FAQs
1. What is bathroom vanity lighting installation, and why does placement matter?
A: Bathroom vanity lighting installation is the process of mounting a fixture above or beside a bathroom mirror to provide shadow-free task lighting. Placement determines whether the light flatters or distorts, with side-mounted sconces at eye level delivering the best results.
2. How wide should my vanity light fixture be?
A: For above-mirror installation, choose a fixture that is 75 to 80 percent of your mirror’s width. A 48-inch mirror pairs best with a 36 to 40-inch light bar for optimal coverage without overspill.
3. Can I install a bathroom vanity light myself?
A: A straight fixture swap on an existing electrical box is a manageable DIY project for homeowners with basic electrical experience. Adding new boxes, running wiring, or working near a tub or shower requires a licensed electrician.
Q: What bulb color temperature is best for bathroom vanity lighting?
A: A color temperature of 2700K to 3000K produces warm white light that is flattering for grooming tasks and complements most bathroom finishes. Avoid bulbs above 4000K, which produce a cool, clinical light that is unflattering for skin tones.
Q: How do I know if my electrical box can support a new vanity fixture?
A: Standard boxes are rated for fixtures up to 35 pounds. Check the weight of your new fixture before installation. If it exceeds the box rating or if the box feels loose in the wall, install a fan-rated box or a brace kit before mounting the new fixture.