Did you know that bathrooms are among the riskiest rooms in your home for electrical shocks? According to the Electrical Safety Foundation International, thousands of shock-related injuries occur each year, with water exposure being a major factor. Installing a Ground Fault Circuit Interrupter (GFCI) can significantly reduce these risks.
This guide will walk you through everything you need to know about bathroom GFCI installation, from understanding how these outlets work to a step-by-step DIY process. Whether you’re a seasoned DIYer or just considering whether to hire a professional, this article provides practical insights, safety tips, and cost considerations to help you make the best decisions for your home.
What is a GFCI Outlet and Why Bathrooms Need Them
A GFCI outlet is a specialized electrical outlet designed to prevent shock by detecting ground faults. Unlike standard outlets, GFCIs monitor the flow of electricity between the hot and neutral wires. If they sense an imbalance as small as 4 6 milliamps often caused by water contact they cut power almost instantly.
Bathrooms are particularly high-risk areas because water and electricity are dangerous together. Showers, sinks, and tubs increase the chance of accidents, making GFCIs not just a convenience but a safety necessity. The National Electrical Code (NEC) has required bathroom GFCI protection since 1975, and updates over the decades have expanded coverage.
Older homes may lack proper protection or have outdated outlets, so understanding when your home was built and what code applies is crucial. Bathroom GFCI installation ensures compliance with safety standards, protecting your family from potentially fatal shocks and giving you peace of mind.
GFCI Outlet vs. GFCI Breaker: Which is Right for Your Bathroom?
Many homeowners skip this comparison, but it’s important. A GFCI outlet protects a single outlet and any downstream outlets connected to its “load” terminals. It’s easy to test and reset directly at the outlet. A GFCI breaker, on the other hand, protects the entire circuit from the panel, covering multiple outlets at once.
Cost is another consideration: GFCI outlets range from $12–50, while GFCI breakers are $40–80 or more. Accessibility matters too. If your bathroom has multiple outlets, a single GFCI breaker can be convenient, but testing requires going to the breaker panel.
For most homeowners, installing a GFCI outlet is sufficient. However, if you want whole-circuit protection or have multiple bathroom outlets, a GFCI breaker may be a smarter choice.
Planning Your Bathroom GFCI Installation
Before starting your bathroom GFCI installation, planning is essential. Begin by determining how many outlets you need. The NEC requires at least one outlet per bathroom, but adding more can improve convenience. Outlets should be at least 36 inches from the sink edge and 12 inches below the basin top to comply with code.
If you have multiple bathrooms, consider a whole-house strategy to ensure all circuits are protected. Understanding “line” versus “load” terminals is critical for downstream protection. The line is where power enters the outlet, while the load sends protection to additional outlets. Mistaking these can render your GFCI ineffective.
Finally, check whether local regulations require permits. Many areas allow simple GFCI replacements without a permit, but new wiring may require inspection. Proper planning saves time, prevents mistakes, and ensures your installation meets code.
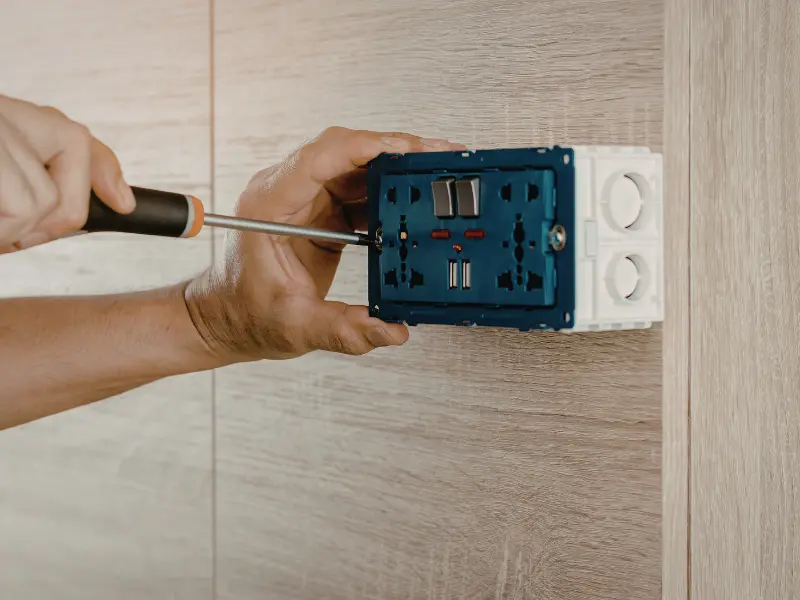
DIY Installation Step-by-Step
Safety is the top priority. Start by turning off the power at the breaker and using a voltage tester to confirm the outlet is dead. Gather your tools: screwdriver, wire stripper, voltage tester, and, optionally, needle-nose pliers.
-
Remove the old outlet: Unscrew the cover and outlet, noting which wires are connected to the brass (hot) and silver (neutral) terminals.
-
Identify line vs. load wires: The line brings power in; the load powers downstream outlets. Incorrect connections can disable GFCI protection.
-
Connect wires: Attach hot wires to brass, neutral to silver, and ground to green. Secure wires under the screws or in the backstab holes if rated.
-
Mount the outlet: Carefully push wires back into the box, screw the outlet in, and replace the cover.
-
Test the installation: Turn the power back on and press the “test” button. Power should be cut off; pressing “reset” restores it.
Troubleshooting tips: If the outlet doesn’t reset, double-check line/load connections, ensure the breaker is on, and verify grounding.
Call a professional if you encounter aluminum wiring, damaged insulation, or inconsistent power. Following these steps ensures safe and compliant bathroom GFCI installation.
Special Considerations for Older Homes
Homes built before 1975 may lack GFCI outlets entirely. Retrofitting these spaces requires extra caution. Two-prong outlets need updating to three-prong GFCIs for modern appliances. Aluminum wiring poses compatibility issues with standard outlets, and knob-and-tube wiring may not support GFCI protection safely.
In older homes, hiring a licensed electrician is often the safest approach. They can install a dedicated GFCI-protected circuit, replace outdated wiring, and ensure all outlets meet current NEC standards. Recognizing these limitations can prevent costly mistakes and hazards during bathroom GFCI installation.
Cost Breakdown: DIY vs. Professional Installation
Installing a GFCI outlet yourself can cost as little as $15–100, including tools. Outlets alone range from $12–50, depending on features. Professional installation is more expensive, averaging $130–300 per outlet.
Factors affecting cost include outlet accessibility, whether new wiring is needed, and local permit requirements. Multiple outlets installed in one visit can reduce labor costs. For DIYers with basic electrical skills, self-installation is often cost-effective. For complex or older homes, hiring a professional ensures safety and code compliance.
Choosing the Right GFCI Outlet
Selecting the right outlet affects convenience, safety, and aesthetics. Consider standard vs. weather-resistant models, outlets with USB ports, LED indicators, and tamper-resistant designs for child safety. Matching outlet color with your bathroom decor adds a polished touch.
Investing in a high-quality outlet ensures your bathroom GFCI installation lasts for years and performs reliably, protecting your home and family.
Maintenance and Testing Schedule
Regular testing keeps GFCI outlets functional. Press the “test” button monthly; the power should cut off, then press “reset.” If it won’t reset, inspect the wiring or replace the outlet. Most GFCIs last 7–15 years, but signs of failure include frequent tripping or failure to reset. Consistent maintenance ensures ongoing safety and avoids costly repairs.
Final Thoughts
Bathroom GFCI installation is crucial for safety, protecting against electrical shock and meeting code. DIY installation is feasible for most homeowners, but older homes or complex circuits may require a professional. Take action today to safeguard your bathroom, your family, and your property will thank you.
FAQs
1. Do I need an electrician to install a GFCI outlet in my bathroom?
You can DIY if you’re comfortable with wiring, but call an electrician for older homes, aluminum wiring, or complex circuits.
2. How do I install a bathroom GFCI outlet safely?
Turn off power, identify line vs. load wires, connect hot, neutral, and ground to correct terminals, then test with the built-in buttons.
3. Do bathroom GFCI outlets need to be hardwired?
Yes, GFCI outlets are hardwired into your circuit to provide proper protection for all connected outlets.
4. How often should I test my bathroom GFCI outlet?
Test monthly by pressing “test” then “reset” to ensure it cuts power and resets properly.
5. Can I replace an old two-prong outlet with a GFCI in older homes?
Yes, a GFCI can replace two-prong outlets without rewiring, but check local code and grounding requirements.